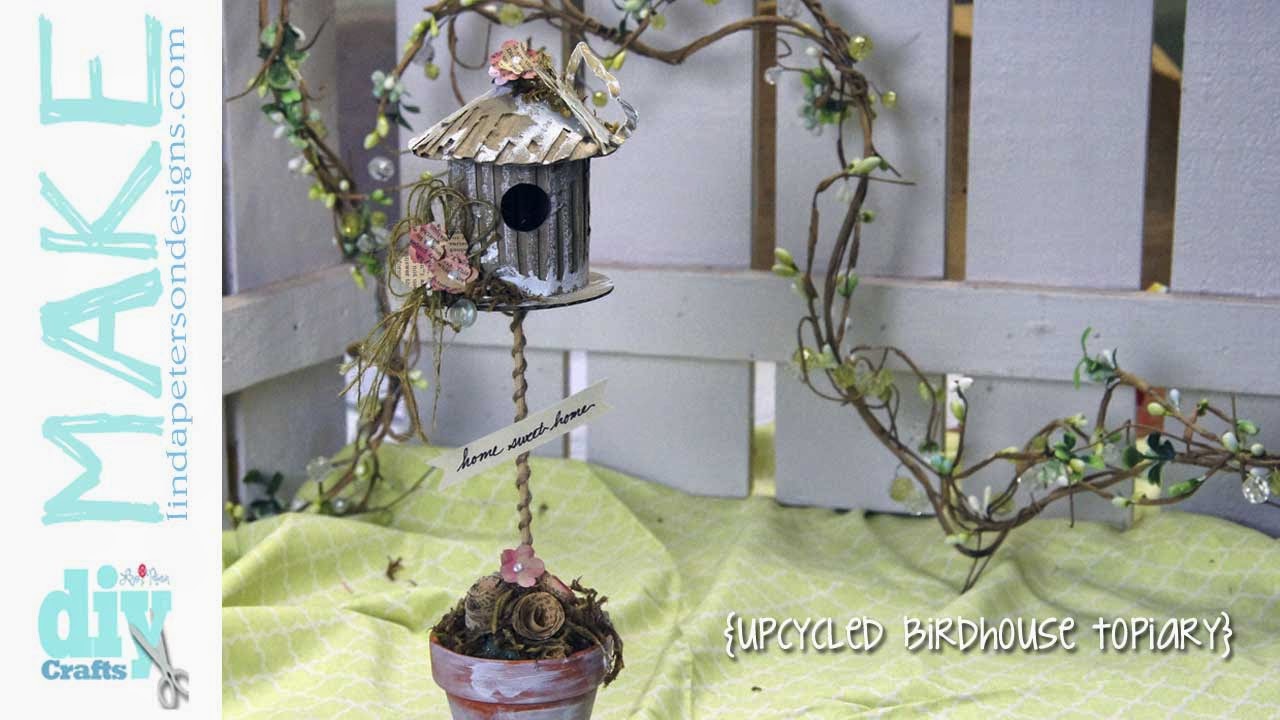
Make an Upcycled Birdhouse Topiary in less than an hour! In this video I show you an easy way to create this birdhouse from cardboard boxes to decorate your table or next party.
Click here to view on Youtube
Up-cycling and recycling has become a family joke for me. My entire family knows not to throw anything away unless they ask first! Cardboard from boxes are one of my favorite mediums to use since they provide a lot of texture and lend an element of shabby chic to my style. For today’s project, I’m up-cycling an old box to create a fun spring inspired birdhouse topiary. I hope it breathes a breath of spring into your home!
Birdhouse Topiary Instructions
(C) 2014 Linda Peterson Designs
Here’s what you’ll need:
GC-001 Grand Calibur® machine
S4-114 Spellbinders® Standard Circles LG
S5-131 Spellbinders® A2 Matting Basics
S4-378 Spellbinders® Cherry Blossoms
MD1-012 Spellbinders® Media Mixáge™ Circles Three (optional)
MD6-008 Susan Lenart Kazmer™ Spellbinders® Media Mixáge™ Brass Butterfly Blank
Cardboard
Dictionary paper
Tsukineko® Memento Luxe ink in Rosebud
Acrylic Paint – white
Spanish Moss
Bamboo skewer
Mini clay pot with foam inserted
Twine
Hot glue
Scissors
Paint brush
Cut one #7 (with 1 being the smallest) from matting basics, one each of the #5 and #7 Standard Circles using cardboard with Grand Calibur machine.
Tear some of the top paper away from the cardboard on all three pieces to expose some of the texture.
Dry brush white paint to the surface of all the pieces.
Cut rectangle in half lengthwise (to measure approximately 2 ½” x 7”). Cut a circle in the center of the rectangle using the #1 die from the Media Mixage Circles 3 set. Bend edges around to form a cylinder and hot glue edges.
Apply hot glue to the bottom straight edge of the cylinder and center onto the small circle.
Cut a slit in the larger circle halfway from the bottom to the middle with scissors. Form a cone, by folding edges over and overlapping the seam. Glue seam in place. Attach to top of birdhouse with glue.
Insert a skewer into the bottom and glue. Wrap skewer with twine and insert opposite end into the foam inside the pot.
Glue Spanish moss where desired to the birdhouse and pot.
Cut out several flowers from the Cherry Blossom set using dictionary paper. Ink edges and glue onto birdhouse where desired.
Lightly brush brass blank with acrylic paint. Glue to birdhouse.
Add sentiment and any other additional embellishments desired.
Place both die cuts onto the cutting plate and position the #3 Hearts 1 die onto the letterpress cut out approximately 1 1/2” from the top with point side down and the #5 circle onto the Media Mixage cut out approximately 1 ” from the top of the circle. Cut out.
Discard the top half of the heart. Glue remaining pieces together as shown in photograph to create an owl.
Spatter green paint to the surface of white card stock. Stamp leaf patterns. Let dry.
Glue owl in place. Shade with graphite pencil and add any additional doodles and outlines desired with permanent marker.
Want a sneak Peek of Monday’s video? I’ll deliver it right to your inbox along with helpful hints and suggestions that I share only with my subscribers. Enter your email address *NOW* in the box below.
Please follow the instructions in the confirmation email to confirm your subscription. Thank you!


